Dieses Blog durchsuchen

Posts mit dem Label MFTstamps werden angezeigt. Alle Posts anzeigen

Samstag, 12. Oktober 2019

Foxy Birthday

Hallo ihr Lieben, 

heute habe ich euch eine kleine Karte mit herbstlichen Hintergrund mit Kuretake Gansai Tambi (es glitzert so schön! )  mitgebracht.

Habt ihr übrigens schon bei der laufenden Challenge mitgemacht? Schaut vorbei und macht mit! 


Der Fuchs habe ich mit den Alkoholmarkern von Spectrum noir koloriert. 
Den Fuchs habe ich mit Foam Tape auf die Karte geklebt und darunter ein kleines Garnfädchen in Gold darunter fest gemacht! 

Hoffe ich konnte Euch inspirieren
Liebste Grüße 

Eure Karo von karoscrafting 

Donnerstag, 29. August 2019

Giftbag

Hallo Ihr Lieben,

Ich habe Euch heute eine kleine Geschenktasche mitgebracht!
Eine Freundin hat zum Kaffeeklatsch eingeladen und da musste was kleines her zum mitbringen!
So entstand diese kleine Giftbag. Viel Spaß bei der kleinen Anleitung. 


Das Designpapier ist aus meiner Schublade ich weiß leider nicht mehr von welchem Block oder welcher Firma der war oder das Papierstücken ist!


Der super tolle Fuchs den Stacey Yakula designt hat für MFT hat es mir total angetan! Habe ihn mit Alcoholmarkern von Spectrum noir und Copics coloriert und ihn dann ausgeschnitten auf der Rückseite mit Foam Tape versehen und dann ein bisschen von einem Silbergarn angeschnitten und auf die Foam Tape Stücke geklebt und so das Füchslein mit dem Garn auf die kleine Tasche geklebt! 


Da ich das ganze etwas leer fand habe ich zusätzlich von Lucy‘s Little Thinge diese bunten Herzchen draufgeklebt und mit einem Jutefaden den ich doppelt und dreifach benutzt habe oben zugebunden und auf der Rückseite mit einem kleinen Tag versehen diese habe ich ausgestanzt und dann bestempelt!


Ich hoffe ich konnte Euch inspirieren und freue mich schon jetzt auf den nächsten Post 

Liebste Grüße 
Eure

Karo von karoscrafting

Montag, 13. Mai 2019

Beautiful Birthday

Hallöchen Ihr Lieben,

ich hoffe die alle Mamis da draußen hatten gestern einen wundervollen Muttertag!


Ich habe heute gleich 2 Projekte gemacht, bzw. habe die Reste der Karte gleich wieder verwertet.

Das Stempelset von MFT birth-yay hat es mir ja ein wenig angetan! Das gefällt mir super gut. Habe heute eines der Nashörner genommen die Partymütze etwas verziert.


Ich habe Gansai Tambi Pearl Colours (Pink, lila und gold) auf das Aquarellpapier mit viel Wasser vermischt. Mit dem Embossingfön trocken gefönt und dann mit der MFT Stanze Beautiful den Hintergrund der ersten Karte ausgestanzt und gleichzeitig noch ein Bogen weißes Papier ebenfalls mit der Stanze ausgestanzt.


Vom weißen Papier nahm ich den Schriftzug für den Aquarellhintergrund der ersten Karte zu kreieren. Die Umrisse des ausgestanzten Wort Beautiful vom Aquarellbogen habe ich für die zweite Karte benutzt so dass die Karte nicht nur weiß ist. 

Ich hoffe ich habe Euch inspiriert 
und freue mich auf den nächsten Blogpost.

Liebste Grüße

Eure Karo von karoscrafting


Mittwoch, 6. März 2019

Von Herzen....

~Werbung~ 
**
Hallo Ihr Lieben, 
**
heute möchte ich Euch meinen Beitrag für den Cards und More Shopblog zeigen. Momentan stehe ich total darauf die Hintergründe mit Stencils und Embossingfoldern zu bearbeiten. Dieses hier ist von dem Hersteller Mundart, viele tolle neue Sachen findet ihr davon im Shop. Die Auswahl an Stencils ist wirklich riesig, zum Glück *hihi*, da findet Frau immer was.  Hier habe ich noch ein Motiv von MFT Stamps (Bitty Bears) verwendet mit einem Spruch dazu, den ich auf das MFT Stamps Banner gestempelt habe. Die Schablone habe ich mit einem tollen kräftigen Pink der Spectrum Noir Stempelkissen bearbeitet, ich liebe diese kräftigen Farben, ihr werdet sehen, es wird bald ganz bunt hier. 
**
Wünsche Euch noch einen tollen Tag, bis bald.
**
Clarissa

Donnerstag, 4. Oktober 2018

Pattern Stamping Fall Card

Hello friends! Happy October! As we walk through the heart of autumn, I decided to stamp a background in fall colours.


So I searched my ink pads and pulled out a warm yellow, a deep orange, a purple, an olive green and a light brown. For my images I used the MFT Sketchy Flowers stamp set, stamped with gray ink onto cream card stock. When all the stamping was done, I die cut the panel using the MFT Stitched Rectangles dies.

For the sentiment, I die cut a big 'hi' using the Altenew Bold Alphabet dies and black card stock. I also white heat embossed the 'hello friend' which comes from the MFT Happy Hedgehogs stamp set on a strip of black card stock that was cut with the MFT Essential Fishtail Sentiment Strips dies.


Everything was then adhered with foam tape onto a light gray card base. As a final touch I went over some of the images with clear Wink of Stella shimmer pen and added a few matching sequins here and there.


As always thank you so much for stopping by! Hope you have a lovely week and I'll see you soon!


Supplies:
MFT Sketchy Flowers stamp set
Tim Holtz Stamp Platform
Altenew Bold Alphabet dies
MFT Essential Fishtail Strips dies
MFT Stitched Rectangle dies
Tim Holtz Glass Media Mat
Nuvo White Embossing Powder
Embossing Heat Tool
Versamark ink
Sizzix Big Shot
Clear Wink of Stella

Freitag, 8. Juni 2018

Muted Flowers CAS Card

Hello friends! Athena here to share a pretty simple card design that you can recreate using various inks and solid stamp images. I chose the MFT Rustic Wildflowers stamp set.


This stamp set is a layering set, meaning that there are 2 or 3 stamps to built your flowers by using different shades of inks and give them more depth. But for my card today, I simply used the most solid of the images and one that was meant to be used as a flower center was used as an individual little flower. I also used a muted color palette consisted by sage, two shades of muted blue, a beige and a bright yellow for contrast.

So I started by stamping a flower arrangement on a piece of white card stock. I used my stamping platform for that, since most of the images had to be stamped twice. Then I trimmed off a piece of the panel and foam mounted the two pieces on a standard A2 card base.


For the sentiment I blended the same yellow ink on another piece of white card stock before die cutting the MFT 'hello'. I continued by die cutting 3 more hellos and adhering one on top of the other to have one sturdy word die.

I added foam squares behind the die cut sentiment and adhered it in between the stamped flowers.
To embellish, I added a few Nuvo drops in Orange Marmalade here and there.


I hope I've given you some inspiration on how to use your stamps alternatively and make the most out of it. You can find list of supplies down bellow. Have a nice and crafty weekend and I'll see you soon!


Supplies:
MFT Rustic Wildflowers stamp set
Tim Holtz Stamping Platform
Ranger Ink Blending Tool
Nuvo Jewel Drops - Orange Marmalade
Foam Squares

Donnerstag, 3. Mai 2018

Gnome me

Hallöchen ihr Lieben, 

wie versprochen kommt heute die Seite 2 der Gieskanne aus dem Überraschungspacket der lieben Dunja, 


Der kleine Gartenzwerg habe ich mit den Zig clean color real brushes auf Aquarellpapier  coloriert und ausgeschnitten.


Ich hoffe Euch gefällt meine zweite Seite der Gieskanne und freue mich auf den nächsten Post. Ich hoffe ich konnte Euch ein wenig inspirieren.

Liebste Grüße und bis zum nächsten mal 

Eure Karo von karoscrafting

http://cards-und-more.de/de/ranger-tim-holtz-distress-oxides-ink-pad-lucky-clover.html

http://cards-und-more.de/de/ranger-tim-holtz-distress-oxides-ink-pad-twisted-citron.html
http://cards-und-more.de/de/ZIG-CLEAN-COLOR-REAL-BRUSH---Set-of-60-Colours.html
http://cards-und-more.de/de/Dutch-Doobadoo-Dutch-Mask-Art-A5-Leaves.html

Mittwoch, 25. April 2018

Mother's Day card with MFT Rustic Wildflowers

Hello and welcome! Athena here to share a card especially made for Mother's day, but since the actual word 'mom' isn't written on the front panel, you can always give it to someone who's really special to you.


Card Details

First I stamped a bunch of flowers and leaves from the stamp set. I went with a pink-yellow-purple palette, perfect for spring. Then used the coordinating dies and cut them all out.

For the background, I blended Broken China Distress Ink on a piece of white card stock that was then die cut with the MFT Stitched Rectangle STAX die-namics. Splotches of both water and Broken China Distress Ink were added on top before arranging the flowers and leaves into a cluster.


I white heat embossed the sentiment on a stripe of black card stock that was then cut with fish tail in both ends and foam mounted next to the flowers.

As a final touch, I added droplets of Nuvo Morning Dew Crystal Drops here and there.


I hope I've given you some inspiration to make your loved ones feel extra special. Don't forget that you can find all the supplies in Cards Und More shop. Dunja will be so happy to help you!

Thanks so much for stopping by and I'll see you next time!


Supplies:

MFT Stitched Rectangle STAX die-namics
MFT Rustic Wildflowers stamp set
MFT Rustic Wildflowers die-namics
Broken China Distress Ink
NUVO Morning Dew Crystal Drops
Foam squares
Nuvo Embossing Powder
Versamark Emboss Ink Pad Clear
X-cut Super Trimmer
Tim Holtz Scissors

Mittwoch, 4. April 2018

Gartenzwerge Teil 1


Hallöchen Ihr Lieben,

schön dass Ihr wieder hier seid. 
 
Heute zeige ich Euch wieder was kreatives aus meinem Überraschungspacket das ich von Dunja geschickt bekommen habe!!! 


Ich habe aus der Gieskanne auf der einen Seite ein kleiner Gartenzwerg das gerade Blumen an einer Mauer gepflanzt hat gezaubert. Die Seite 2 der Gieskanne gibt es im nächsten Blogpost!

Ich habe ein Stencil von Dutch Doobadoo Brick benutzt. 
Zuerst habe ich die Schablone mit der Distress Oxide Farbe iced sprue und dann nochmals etwas versetzt mit Nuvo embellishement mousse in der Farbe persian red
aufgetragen.


Aus dem MFT Set You gnome me habe ich Zwerge, Pilze und Schnecken mit den Zig clean Color real brushes angemalt und ausgeschnitten und später auf die Mauerseite geklebt!


Ich hoffe mein kleiner kreativer Gieskannenpost Teil 1 gefällt Euch


Ganz liebe Grüße 


Eure Karo von karoscrafting 
 
http://cards-und-more.de/de/ZIG-CLEAN-COLOR-REAL-BRUSH---Set-of-60-Colours.html


http://cards-und-more.de/de/tonic-nuvo-embellishment-mousse-persian-red.html


http://cards-und-more.de/de/ranger-tim-holtz-distress-oxides-ink-pad-iced-spruce.html

Mittwoch, 21. März 2018

MFT Flamazing Birthday Card

Hello and welcome back! Athena here today and I have another birthday card to share with you featuring the MFT Flamazing Stamp and coordinating dies set.
Me, I don't really like unicorns, but I adore flamingos! I think they look so funny and adorable at the same time! So after making a little research on the flamingos stamps I ended up with the MFT ones for a few reasons: good size, build up stamps, three flamingos plus scene building images, coordinating dies and lots of great sentiments.


Let's take a look at the process. First, I stamped all the different parts of the flamingo using two shades of pink, a light gray and a black ink. I also stamped the butterfly and three little flowers in more purplish  colors. Then I die cut the images using the coordinating dies.


For the background, I created a little scene using the palm tree stamps and one of the other flamingos. Only this time I used two shades of gray ink, just to drive the attention onto my pink flamingo. I only stamped the water using a blue ink that matched the blue on the patterned paper that I used. After all the stamping was done, I die cut the panel with the MFT Stitched Basic Edges Die-Namics.

Now for my base panel I found this piece of striped patterned paper in my stash but you can achieve this look with many other ways. You can use a stripes stencil with ink or with paste, you can use watercolors and a brush, you can even use masking tape and do some ink blending over it. Anyway, I went ahead and stamped my sentiment using gray ink and then foam mounted everything onto a standard A2 card base.


I must confess that I searched the entire house to find one googly eye for my flamingo but couldn't find any. Anyway, it's still flamazing, don't you think? I can see my self making some more flamingo cards this summer!

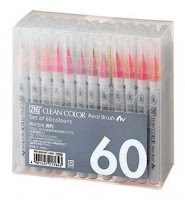
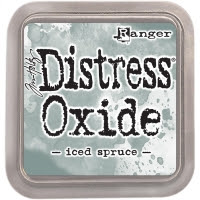
Below you'll find most of the supplies I used and a recommended patterned paper in case you're interested.
Hope I've given you some inspiration to try this gorgeous set. Have a great day and I'll see you soon!


Challenge #67 - Anything Goes

Hallo liebe Cards und More Freunde, wir haben heute wieder eine neue Challenge für Euch. Dieses Mal gibt es ein Board für euch, das euch zur...