Dieses Blog durchsuchen

Posts mit dem Label mask werden angezeigt. Alle Posts anzeigen

Donnerstag, 14. November 2019

Ho Ho Hooo... Joy to the world!

Na, seid's ihr schon in hitziger Adventstimmung und schon emsig am vorweihnachtlichen Werkeln? ...oder mögt ihr es doch lieber geruhsamer, bis der inspirierende Ideensprudel euch am Schlawittchen packt?


Well, are you already in a hot Advent mood and already busy on pre-Christmas work? ...or do you prefer it more leisurely, until the inspirational ideas collar you?


Nun gut, meine klitzekleinen Kartenwerkle - wie diese backfrische Weihnachtskollektion im schneeweißen Gewande - mögen für manchen unter uns vielleicht schon astronomisch wirken, aber dafür gibt es immerzus ein paar smarte Details zu entdecken, welche man für seine eigenen Kreationen ummünzen kann.


Well, my tiny little cards - like this fresh Christmas collection in the snow-white garment - may seem astronomical to some of us, but there are always a few smart details to discover, which you can remake for your own creations.


Wie ihr hier seht, befasste ich mich als Newbie mit der Materie der transparenten "Dutch Structure Paste" samt einer glitzernden Prise. In der ersten Version schnippelte ich mir anhand eines sternigen Stanzförmchens sowie einem Folienstückle eine eigene Mask zurecht und spachtelte testweise  auf dem herrlich praktikablen "Wendy Vecchi Make Art STAY-tion" etwas Paste auf ein Cardstockeckle auf, welches ich flugs mit goldigem Glitzer berieselte. In der zweiten Variante wählte ich spontan den Freestylelook und kreierte die luftig leichten Erhöhungen auf den Gipfeln des blauen Backgrounds.


As you can see, as Newbie I dealt with the matter of the transparent "Dutch Structure Paste" with a glittering pinch. In the first version I sniped my own mask using a star-shaped die and a piece of transparent foil and poured some paste onto a cardstock top on the wonderfully practical "Wendy Vecchi Make Art STAY-tion", which I sprinkled with golden glitter.


In der lupenreinen Detailansicht erscheint die flink trocknende Paste trotz ihrer farblosen Erscheinung recht erhaben und fällt dadurch auch nicht zu arg schneelastig ins Gewicht...


In the detail view the fast-drying paste appears quite sublime despite its colorless appearance and therefore doesn't fall too heavily in weight...


...dessen luftigleichten Effekt ich ebenso bei den einzeln gestanzten Letterchen erwirken wollte. Hierbei türmte ich hochstaplerisch ganz einfach mehrere Lagen übereinander.


...whose air-light effect I wanted to achieve as well with the individually punched letters. Here I simply put several layers on top of each other.


Der hiesige Eyecatcher dieses schrägen Kärtles liegt vor allem auf das klitzekleine Türle gerichtet, da sich dieses via der magischen Flip-Flap-Methodik öffnen lässt. Dafür braucht man einzig das schmale Hebelchen an der Seite in leichte Bewegung versetzen und schwuppdiwupp öffnen sich der Sesam ohne grosses Beitun.


The eye-catcher of this oblique card is mainly aimed at the tiny door, as this can be opened via the magic flip-flap methodology. All you need to do is move the small lever on the side in a slight movement and open the sesame without any help.


Doch selbst bei sperrangelweitem Tore bekommt man den frechen Schlüssellochgucker nur stiebitzend zu sehen und wird weiters auf die Folter gespannt...


But even in the case of wide-open door, you can only see the cheeky keyhole-gazer stubbornly and will continue to be drawn to the torture...


...bis man schliesslich das gesamte Kartenwerke ganz öffnet, um einen Blick auf die Innenseiten zu richten.


...until you finally open the entire Christmas card completely, to look at the inside.


Et voila! Da haben wir unseren Kandidaten, welcher zudem krönend auf einer lustig federnden Action Wobble alles penibel in Augenscheine nimmt.


Et voila! There we have our candidate, who is sitting on a funny action wobble spring.


Joy to the world!
Annett alias "goebie"


Freitag, 20. Juli 2018

Masked Stripes Background

Hi everyone! Today's card started with the idea of using masking tape (or in my case washi tape) to create a masked stripes background.


So after placing a few pieces of tape on a piece of white paper, I colored the ramaining white areas with Mustard Seeds Distress ink. At this stage, I stamped a few flower images using the same ink, to add more interest. Then peeled off the tape carefully and placed it back masking the already colored areas.
I went over the uncolored stripes with a light layer of Evergreen Bough Distress ink. To achieve a light layer of coloring I used a blending brush instead of a blending tool.


I continued by die cutting the panel using a stitched rectangle die. I also die cut a tag shaped window out of the panel and placed it temporarily onto the card base and into my stamping platform, in order to align my sentiment. Then removed the panel and stamped the sentiment directly on the card base.
The panel was then foam mounted on top and a little birdie was adhered (also with foam squares) right outside the window.

For coloring the bird I used my Zig Clean Color Real Brush markers 021-Light Carmine and 050-Yellow. I fussy cut it with my scissors. A few clear Pretty Pink Posh sequind were added here and there to accent.


You can find list of supplies below. Thank you for stopping by and I'll see you soon!


https://www.craftforjoydesigns.com/


Supplies:
Flora and Fauna You Me And Tea set

Donnerstag, 1. März 2018

Greetings from...

Hi dear crafters!

Today it's my turn again to show you some fun stuff. I love making a mess with wet embossing.
Slowely the holiday season is coming up, so I made a tag, that you can send from your vacation adress or attach to a gift that you bought on your holiday.

Let's start
As you can see do not need much and not on the photo is the heat tool and the craftsheet. The craftsheet is resistent to the heat and easy to clean with glue, ink and paint and keeps your table clean. And the heattool you need to heat the embossing powder.


Place the mask on  the tag and ink it with the Vintage Photo Distress ink and dry it quickly with the heattool. 


Grab some fun stamps and stamp it with the versamark watermark ink on your tag and sprinkle quickly the ebossing powder on the just stamped part. Carefully discard the rest of the powder back in the jar.  Now get your heattool and place the tag on the craftsheet and gently heat the embossing part.


You will see it starts to shimmer a bit and get it bit thicker than the rest of the part. This technic is called wet embossing.
Now you can have some fun with all kinds stamps on it. You can use some more of this technic or normal stamp it. 


You may want to use other colors with the embossing colors and ink. Try it!

Show us your creations maybe you can use the color theme of  our challenge and maybe win something!!!

Bild könnte enthalten: Text


Keep on craftin'


Materials
Tsukineko VersaMark MINI Emboss Ink Pad clear - Embossing Kissen transparent Distress Ink™ Stempelkissen Walnut StainRanger Inkssentials Non-stick Craft Sheet (Mat) 15MBoss Embossingpowder | Embossing Pulver - Vintage Red
Embossing Heat Tool - Heißluftfön | EmbossingfönDutch Doobadoo Dutch Mask Art - Wavy Stripes

Mittwoch, 23. Juli 2014

Guestdesignerin Evelyn - Ein Sommerlayout

Hallo ihr Lieben,

da bin ich wieder! Und dieses Mal habe ich für euch ein Layout vorbereitet.


Die Fotos auf dem Layout stammen aus unserem Sommerurlaub 2012 und ich wollte sie schon lange verscrappen. Als ich dieses wunderbare Designpapier La Maison Rose 05/06 von ILS gesehen habe mit diesem tollen Watercolor-Effekt, da war sofort klar, dass diese Fotos perfekt passen. 

Unter den Fotos habe ich die Flower Mask von Dutchdoobado zusammen mit einer Modeling Paste verwendet. Es ist ein toller Effekt und so einfach und schnell gemacht.


Als Ergänzung habe ich noch das Designpapier Beige Memories von Inkido eingesetzt und damit sowohl die Fotos gemattet und unten links die Ecke verziert. Es hat die Farbe von Strandsand und ich hab mich sofort in die Sterne verliebt.

Unter dem rechten Foto habe ich eins der Tags mit einem Umschlag aus Vellum von Melissa Frances versteckt und an diesem zu leichten Herausnehmen natürlich noch ein Band angebracht. Das Tag habe ich für das Journaling benutzt um ein paar Erinnerungen an unseren tollen Urlaub festzuhalten.


Zum Schluss habe ich noch etwas ausgestanzt, verschiedene Wood Veneers verteilt und ein wenig gestempelt.

Ich hoffe, dass euch mein Layout gefällt!

Hier kommt noch meine Liste der Produkte aus dem Cards und More Shop:

http://www.cards-und-more.de/TAG-s/Melissa-Frances---Vellum-Envelopes---Tags---Green.html   http://www.cards-und-more.de/PAPIERE/Inkido/INKIDO-Beautiful-Memories-II---Designpapier---Beige-Memories.html   http://www.cards-und-more.de/DUTCH-DOOBADOO-715/Dutch-Mask-Art/DUTCH-DOOBADOO---Dutch-Mask-Art-A5-Flower-5112.html   http://www.cards-und-more.de/EMBELLISHMENTS---DEKO/Lace--Ribbons--Kordeln/GARN---MEHR/GARN---MEHR-Baecker-Garn-Leinen-Zwirn.html

Mein nächster Beitrag hier wird dann leider auch schon mein letzter Beitrag als Guestdesignerin für Cards und More sein. Bis nächste Woche also, ich freu mich drauf!

Liebe Grüße
Evelyn


Montag, 14. Juli 2014

Summer vintage

Hi all friends "Cards und More"
Here Irena again.
I have a card today - summer vintage.
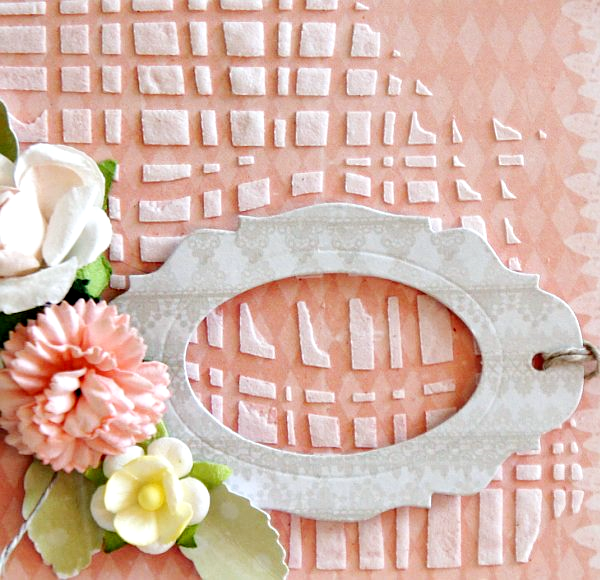
I used the one mask with DUTCH DOOBADOO
I used also beautiful papers from Studio 75 'Vintage Memories'
Although it has multiple layers can be done quickly.
Sending wishes for a most crafty day!
Thanks for stopping by,
Irena/Rudlis


http://www.cards-und-more.de/DUTCH-DOOBADOO-715/Dutch-Mask-Art/DUTCH-DOOBADOO---Dutch-Mask-Art-A5-Fabric-5115.html   http://www.cards-und-more.de/PAPIERE/Studio-75/Vintage-Memories-01-Designpaper--Studio75-.html    http://www.cards-und-more.de/PAPIERE/Studio-75/Vintage-Memories-02-Designpaper--Studio75-.html   http://www.cards-und-more.de/PAPIERE/Studio-75/Vintage-Memories-04-Designpaper--Studio75-.html   http://www.cards-und-more.de/PAPIERE/Studio-75/Vintage-Memories-03-Designpaper--Studio75-.html   http://www.cards-und-more.de/STANZEN---Stanzschablonen/NOOR-Design/Noor-Design-Schneide---Praege-TAG-No--2.html

Challenge #67 - Anything Goes

Hallo liebe Cards und More Freunde, wir haben heute wieder eine neue Challenge für Euch. Dieses Mal gibt es ein Board für euch, das euch zur...