Hallo Zusammen,
Ich bin Kati von KatisDekoEck, und ich freue mich, nun
endlich auch meinen ersten Beitrag als Gast-Designteammitglied für den Cards
& More Blog zeigen zu können.
Aktuell nahen ja die Weihnachtstage mit großen Schritten
und da musste es einfach eine Weihnachtskarte sein.
Da wir aber hier beim Cards & More Blog sind, habe
ich mir direkt mal einen älteren Kartensketch aus der April-Challenge vom Blog
genommen und habe mich davon für meine Karte inspirieren lassen.
Hello crafty friends,
I am Kati from KatisDekoEck, and I am delighted
to finally be able to share my first project as Guest Design Team member here
on the blog of Cards & More.
Let’s face it, Christmas is coming, and soon, so
there was no other choice than to finally get started on my Christmas cards.
Inspired by the April Challenge here on the
blog, I used this card sketch as inspiration for my project:

Zunächst habe ich die weißen Schneeflocken mit
superfeinem weißem Embossingpuder auf die weiße Kartenbasis geschmolzen, und
dann die farbigen Punkte lt Skizze in Weihnachtsfarbem mit Tim Holtz Distress
Inks gestaltet:
First things first, so I started heat-embossing
some white snowflakes onto my white card base using super fine embossing
powder. Afterwards I created the spots featured on the sketch using Tim Holtz
Distress inks in the traditional Christmas colours of red and green.

Diese Karte soll an eine Freundin gehen, die ihre Hunde
so sehr liebt, und daher blieb mir ja schon gar keine Wahl, als einen der
zuckersüßen Hunde aus dem C.C. Designs „Puppy Power“ zu verarbeiten.
This card will be sent to a friend who loves
her dogs dearly. So, I had no other choice than to use these oh-so-cute puppy
stamps by C.C. Designs called “Puppy Power”.

Koloriert habe ich dabei mit ZIG Watercolor Markern auf Aquarellpapier. Dabei verlaufen die Farben so schön und das Schattieren geht quasi von allein.
I coloured the puppy using ZIG Watercolor
Markers on watercolor paper. This ensures smooth colour blending and makes shading
easy.
Ein Weihnachtsmützchen musste mein Hundewelpe natürlich
auch bekommen, ebenso wie einen deutschen Schriftzug.
Am Ende habe ich die Karte noch mit ein paar Glitter Nuvo
Drops in der Farbe „Ruby Slippers“ vervollständigt und fertig ist sie, um an
eine liebe Freundin geschickt zu werden.
We are talking Christmas, right? So, of course
my doggy needed a tiny Christmas hat as well as a dear Christmas sentiment, in
German.
To finish off this card, I simply added some Nuvo
glitter drops in “Ruby Slippers” and my card is ready to be shipped off to my
friend.

Hier noch ein kurzer Überblick über die verwendeten
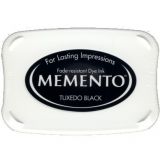
Materialien. Die Memento Ink Pads findet Ihr im Shop statt als große Inkpads in Form der kleinen Dew-Drops zum Ausprobieren
und Liebenlernen…
Here you can find a quick recap of the
materials used to create this card. The Memento ink pads are available in the
shop in a small and handy dew-drop size (which makes falling in love with them even
easier…)
Materialliste
/ List of materials used:
Tim Holtz Distress Inks:
Blending
Tool:
Heissluftföhn
/ Embossing heat gun:
Embossing
Pulver / Embossing powder:
CC Design
Stempel / Stamps:
Nuvo Drops:
ZIG Marker:
Memento
Inks: