Dieses Blog durchsuchen

Posts mit dem Label Tacky Glue werden angezeigt. Alle Posts anzeigen

Freitag, 19. März 2021

GelPress Karte mit herzigen Grüßen

Ein leuchtender Hintergund mit Acrylfarben und einem Art Printing Stempel von Carabelle Sudio.


Mit der GelPress habe ich mich nun etwas eingearbeitet und habe Acrylfarben eingesetzt.

Schnell und doch effektiv lässt sich damit eine schöne Karte gestalten.


Verwendet habe ich hier eine Stanze von Create a Smile, den Gnom von Whimsy und der Text stammt von Dani Peuss.


 Coloriert habe ich den Gnom mit Copics sowie weitere Produkte wie:

-3D Foam Tape

-Cardstock

-GelPress Roller

Ich wünsche Euch einen kreativen Dienstag.

Nicole (Stempelfiziert)

Dienstag, 9. März 2021

Mein erster Versuch mit der GelPress

Mein 1. Blogbeitrag für Cards und More

Ein wenig stolz bin ich ja schon, wieder bei Cards und More dabei sein zu dürfen.
Im Shop gibt es diese tolle Gel Press und ich musste mich gleich damit versuchen.


Da ich noch nicht so viel mit Acrylfarben gearbeitet habe, habe ich es mit den Distress Oxide probiert und bin eigentlich zufrieden mit dem Ergebnis. 
Dazu habe ich auf der GelPress Plate nur die Oxide Kissen aufgedrückt und mit dem Roller die Tinte verteilt.


Danach kann man diverse Schablonen und Stempel vorsichtig aufdrücken und erhält somit diese Formen auf dem Hintergrund. Es wird einfach ein weißer Cardstock oder ein beliebiges Papier auf die gefärbter Plate gedrückt und fertig ist der individuelle Hintergrund.


Dekoriert habe ich die Karte mit dem Gnom von Whimsy und den Texten von Create a Smile. Coloriert habe ich den Gnom mit Copics sowie mit  3D Foam Tape platziert. Noch verwendet habe ich :

-WOW Embossing Pulver

-Glossy Accents

-Tacky Tape

Ich hoffe, mein 1. Beitrag gefällt Euch und ihr hinterlasst mir vielleicht ein Kommentar .

Kreative Grüße

Nicole (Stempelfiziert)

Montag, 17. Juni 2019

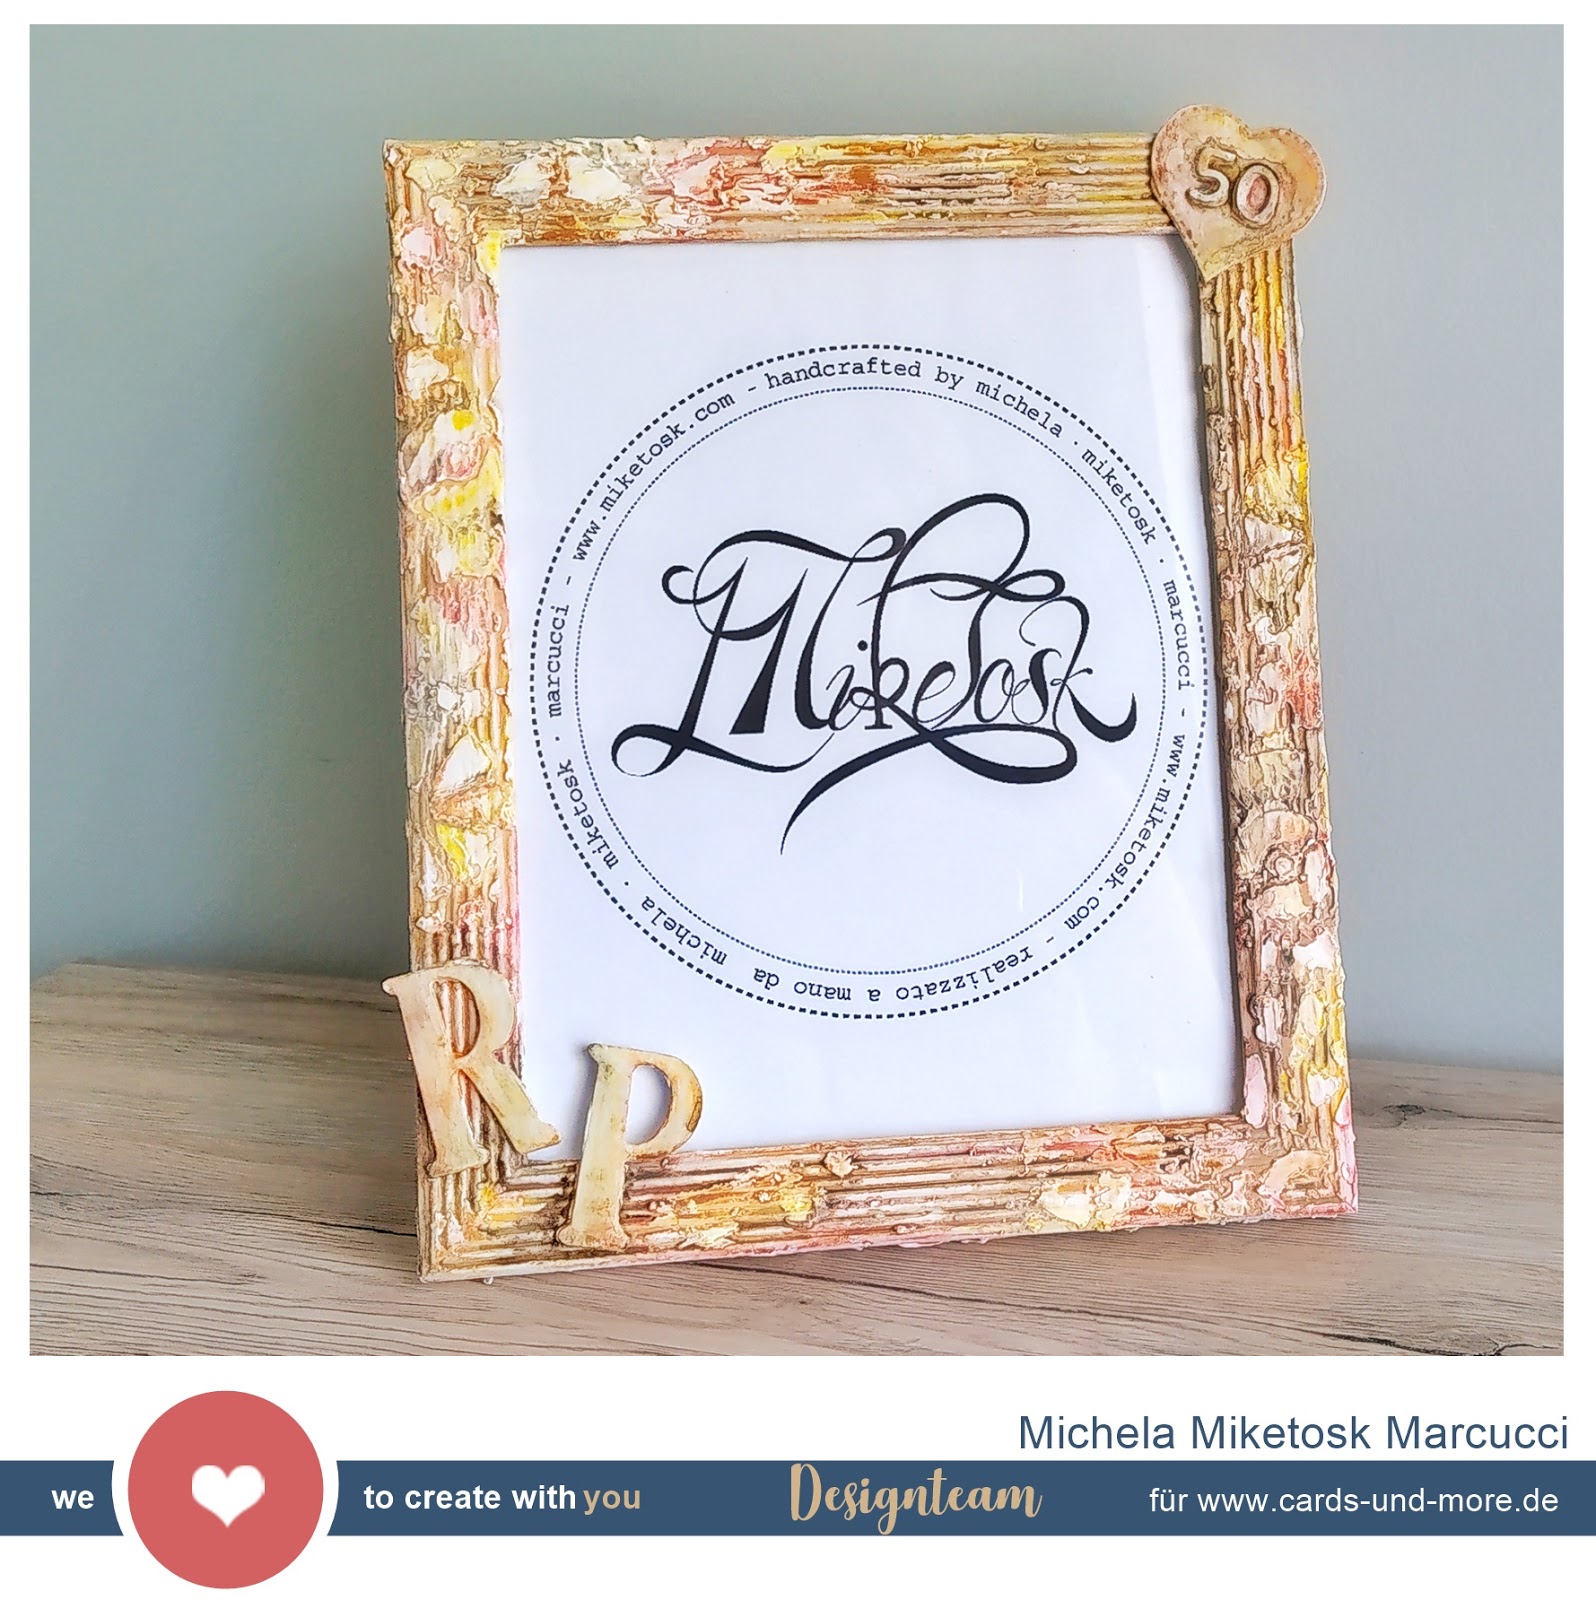
Altered Photo Frame

 Ciao! 😊 


In the last weeks I had so many commissions for photo frames so I've decided to share with you how I created them! This time the gift was for a couple, Riccardo and Paola, that are going to celebrate their 50th wedding anniversary.

I've started with a coat of White Gesso to prime my base and, than I've decide to glue down a corrugated cardboard with Tacky Glue to give more interest to it.
In the meantime that I was waiting to everything to naturally dry I've die cutted couples of hearts, numbers 5 & 0 and letters P & R using my beloved Joy! Crafts Kraft Paper.

At this point it was time to ensemble everything on the frame and add another two coats of White Gesso.

Paying a bit of attentions, with a stencil and heavy gesso I created another layer of interest.

And now the funniest part! With my Pebeo watercolors I've started to color everything giving the stain look I letteraly ADORE, layer after layer dryng sometime with my heat gun.

And here we are! Final touches were to stamp my name with Stazon Jet Black and to add a coat of with gesso to the back to give a more orderly appearance.


Hope you liked it and got inspired... See you super soon for a new blog post!


Michela

Montag, 25. März 2019

Origami Pinwheel (Mini) Card


Ciao! 😊

Today I want to share with you a mini card created using the origami technique.

First of all I cutted a 15x15 cm  base using Joy! Crafts Kraft Paper and, after choosed a flowerish pattern paper, I glued them together using Tacky Glue.

For better results I use to put the product into fine little bottles and, then, use a brayer to spread it everywhere.

While I was waiting for everything to dry I've die cutted an heart (using the other side of the same cardstock) and embossed it with an Italian sentence (which translation is "Only those who dream can fly") with opaque bright white WOW! Embossing Powder and the heat gun.

At this point I've started folding the square base. Below you can see how I done it... Don't be scared, it's easier than you think, it takes about 10 minutes to finish!


For a better result I recommend the use of a scoring board and a bone folder.

As a final touch I glued the heart on the card and, to give something more, I decided to add some embellishments that match perfectly the color of the pattern paper.

Here's some pictures of the card!


Hope you liked it and got inspired... See you super soon for a new blog post!


Michela

Challenge #67 - Anything Goes

Hallo liebe Cards und More Freunde, wir haben heute wieder eine neue Challenge für Euch. Dieses Mal gibt es ein Board für euch, das euch zur...