Hallo Zusammen, ich bin‘s mal wieder, Kati von
KatisDekoEck.
Heute möchte ich euch zeigen, was ich mir für meinen
Weihnachtsmarktstand ausgedacht habe.
Wie oft möchte man ein schönes Geschenk noch etwas
besonderer machen, und da kommen ein paar schöne Geschenkanhänger gerade recht.
Daher habe ich mich hingesetzt, viel verblendet, gestempelt,
koloriert, gestanzt und dekoriert. Heraus kamen dabei diese Besonderheiten:
Dear all, it’s me
again, Kati from KatisDekoEck.
Today I want to show you what I came up with to
present at my Christmas market stall.
How often do you want to make a gift something
really special? This is when a cute and handmade gifttag is perfect.
So I sat down in my craftroom and started some
decent blending, stamping, coloring, cutting and decorating. And the result is
something worth showing:
Aber der
Reihe nach.
But let’s start at the beginning.
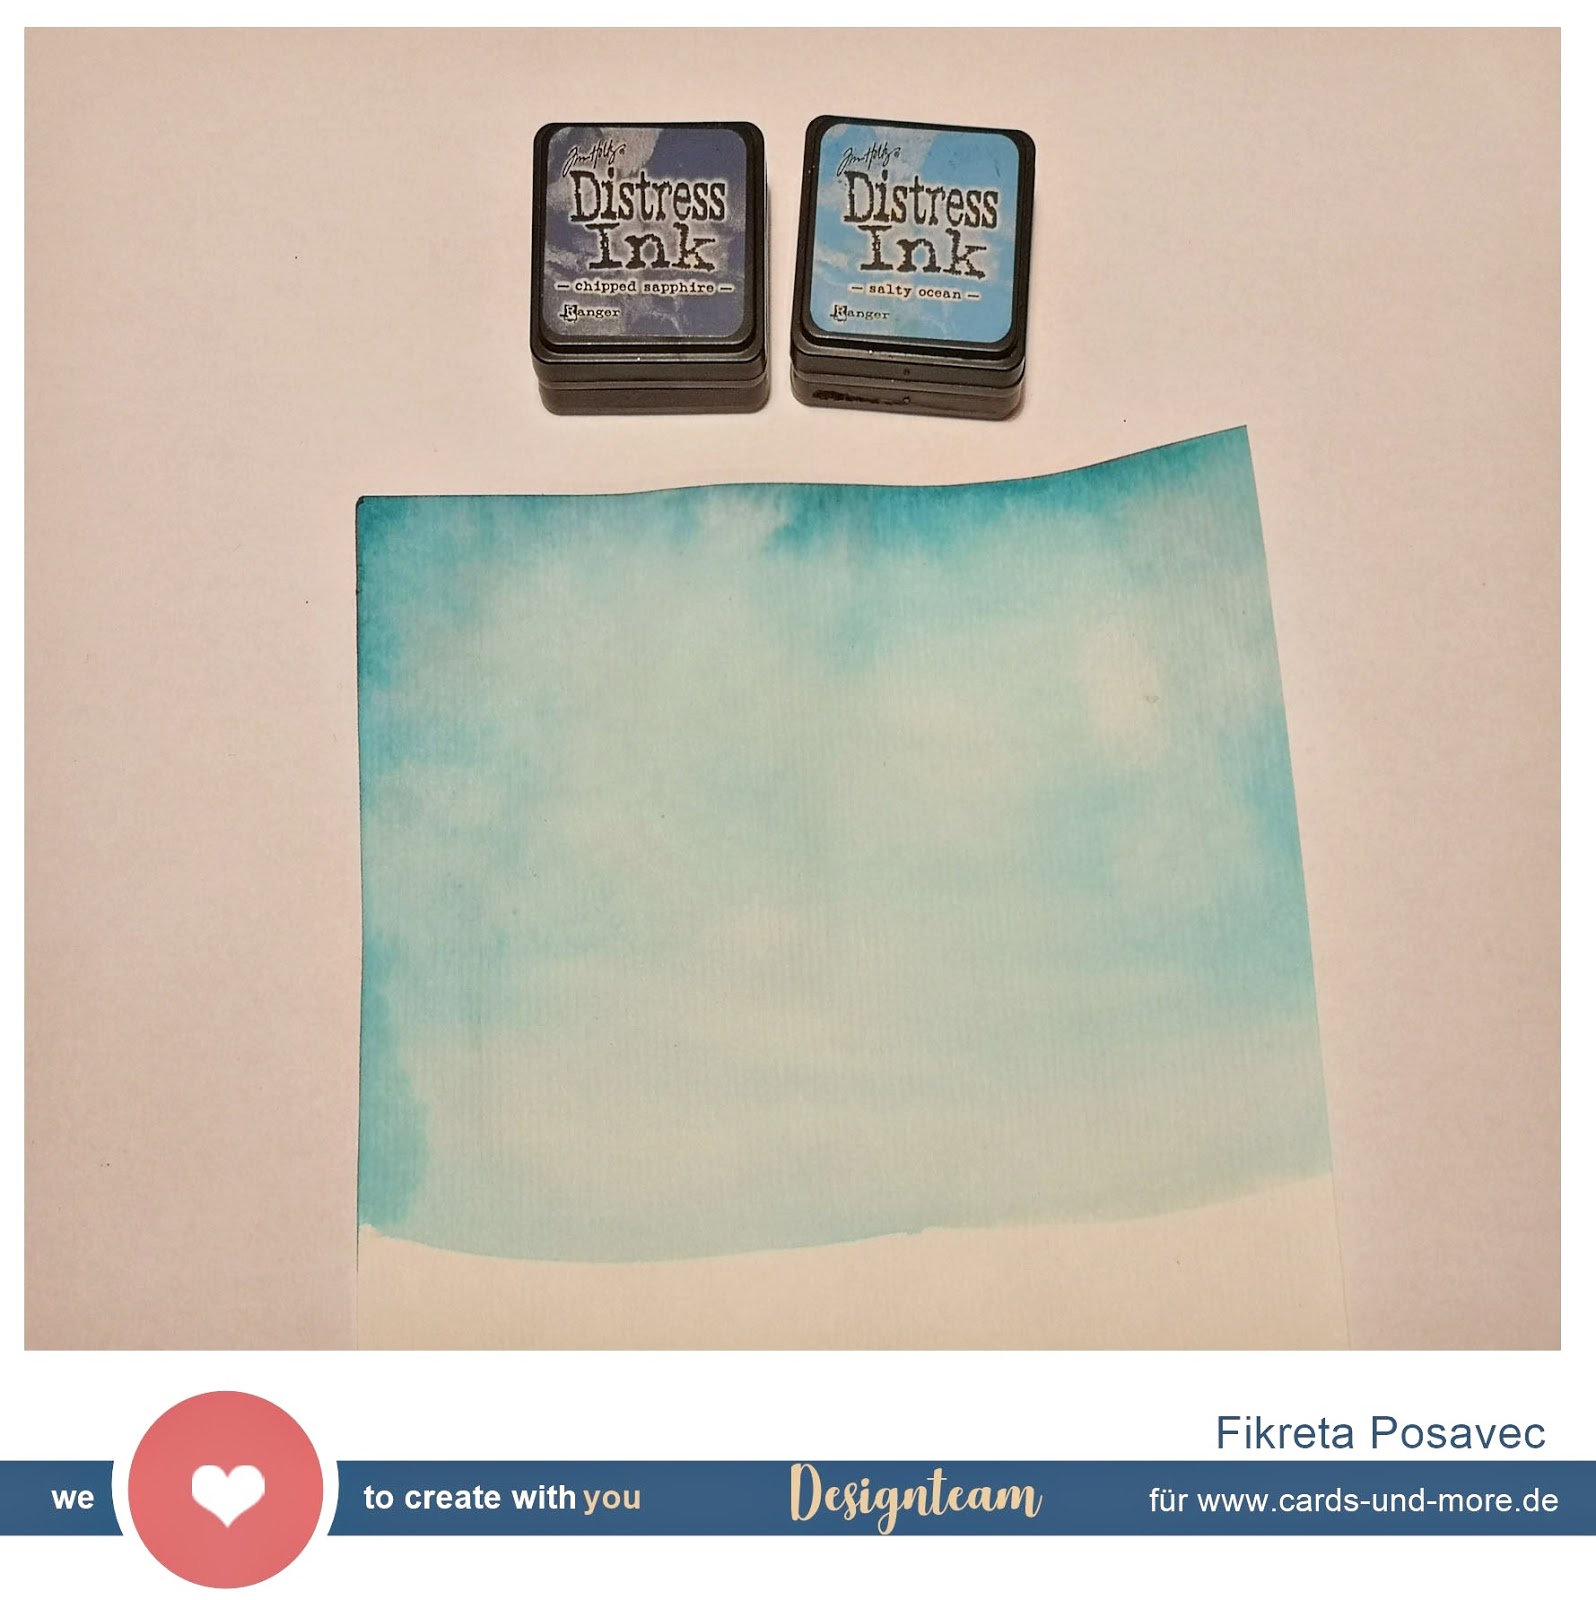
Zunächst der Hintergrund: In Wunschfarbe ist das am
leichtesten zu realisieren, indem ihr mit Distress Inks selbst zusammenmixt,
was ihr gerne haben möchtet, und diese Hintergründe könnt ihr dann noch mit
verschiedenen Schablonen gestaltet:
First backgrounds: the easiest way to get
exactly what you want to is blending the background yourself with Distress inks
in any color you like. In addition you can use some stencils to give the
background more details:
Als nächstes könnt ihr aus den dabei entstandenen
Papieren viele verschiedene Geschenkanhänger ausstanzen. In meinem Fall habe
ich dafür Stanzschablonen von My Favorite Things, Sizzix und Echo Park
verwendet, aber ihr könnt natürlich nehmen, was ihr so in eurem Vorrat habt:
Next you can diecut from the newly created
patterned paper as many different gift tags as you want. For my tags I used
dies by My Favorite Things, Sizzix and Echo Park. But of course you can use
whatever you got in your stash:
Ein Tipp: um auch die Rückseite schön aussehen zu lassen,
stanze ich mein Tags immer auch nochmal aus einem einfarbigen guten Fotokarton
aus und klebe das auf die Rückseite.
One tip: to make the backside of my tags look
neat, I usually cut the same tag from a good cardstock and adhere it on the
back of my tag.
Noch ein Tipp: Wenn ihr gerade keine passenden
Stanzschablonen zur Hand habt, könnt ihr auch einen Streifen aus dem Papier
schneiden, oben links und oben rechts eine Ecke abschneiden und mit einer
Lochzange oder einem Locher ein Loch reinstanzen. Dann sind die Ränder
vielleicht nicht so schön geprägt, aber für den Anfang geht das auch.
Oh, and one more tip: In case you do not own a
perfect tag die, you can simply take your paper, cut a slice from it, cut the
upper edges and punch a hole in it. Voila, you got yourself a tag, it may not
have nicely stitched edges or frames, but it will be a good start.
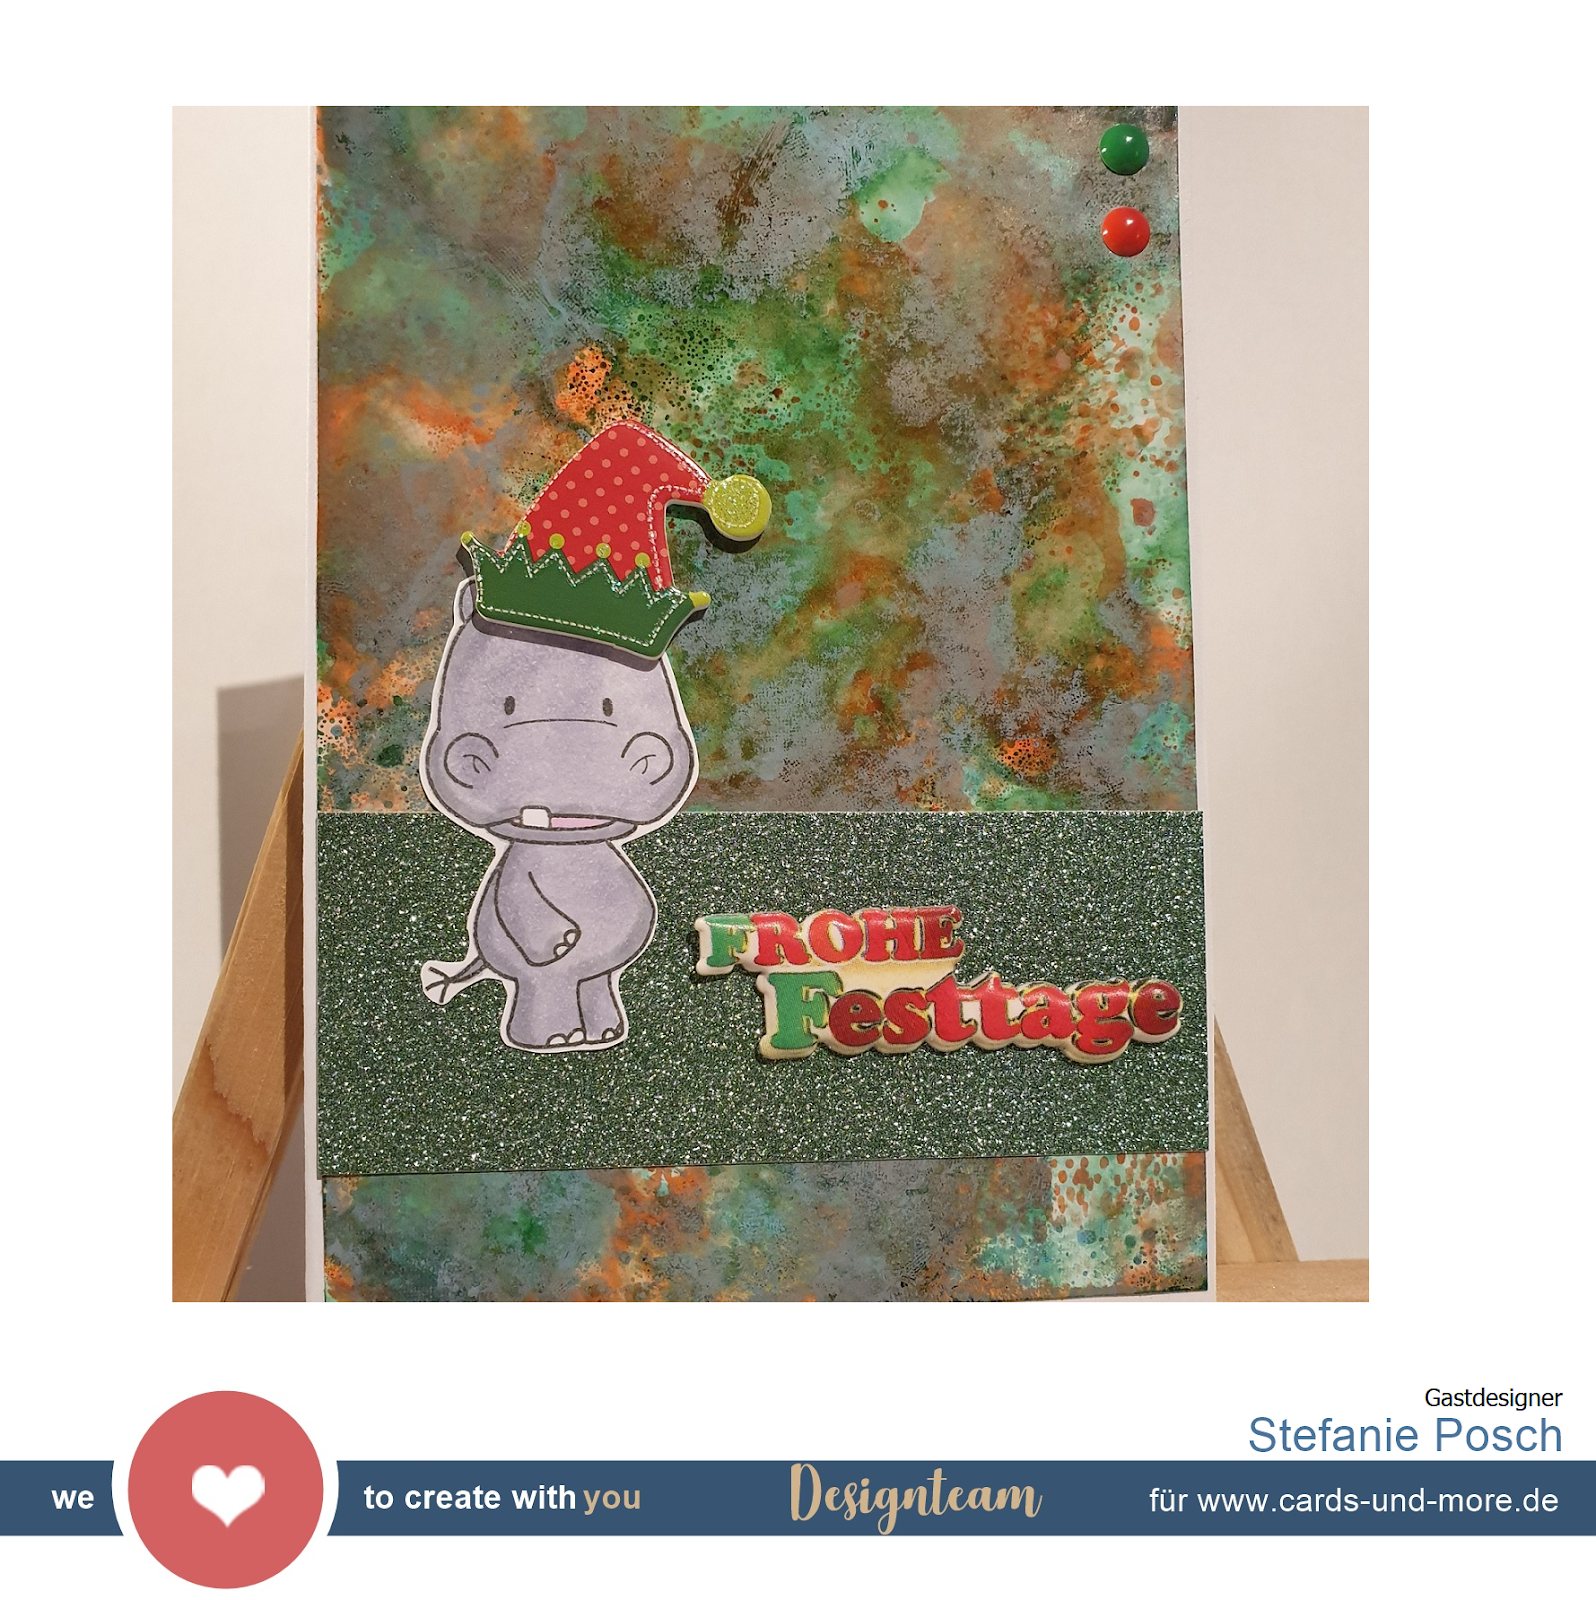
Tja, und dann bleibt schon nur noch, eure Lieblingsmotive
zu stempeln, zu kolorieren und auszustanzen oder auszuschneiden. Und schon könnt
ihr eure Geschenkanhänger nach Lust und Laune dekorieren.
Well, next you just need to stamp and color and
diecut your favorite images. And you can start decorating your tags.
Ich habe für meine Geschenkanhänger-Wünsche deutsche
Stempel aus meinem Vorrat rausgesucht, aber in den Stempelsets unserer
Lieblingsfirmen gibt es auch immer wieder ganz wunderbare lustige und
liebevolle Sprüche auf Englisch. So richtig weltmännisch…
Hand aufs Herz, wer würde sich nicht freuen, diese
Anhänger am liebevoll verpackten Sockenpaar zu finden?
For my tags I chose some stamps with German
sentiments from my stash, but many of our favorite stamp companies feature
perfect funny lovely and cute sentiments in English.
Hand on heart, who would not be happy to find
such a nice tag fastened on the lovely packaged socks one gets on Christmas Eve?
Materials used:
Distress
Inks:
·
Festive
Berries
·
Pine
Needles
·
Shaded
Lilac
·
Wilted
Violet
·
Tumbled
Glass
·
Salty
Ocean
Geschenkanhänger
Stanzschablonen / Tag Dies:
·
Echo
Park “Christmas Gift Tags”
·
Sizzix
“Tags Collection”
Stempelsets
/ Stamps:
·
My
Favorite Things “Santas Elves”
·
My
Favorite Things “ Jingle All the Way”